I’ve talked about this plenty over the past few months, but it finally happened! I made my coat.
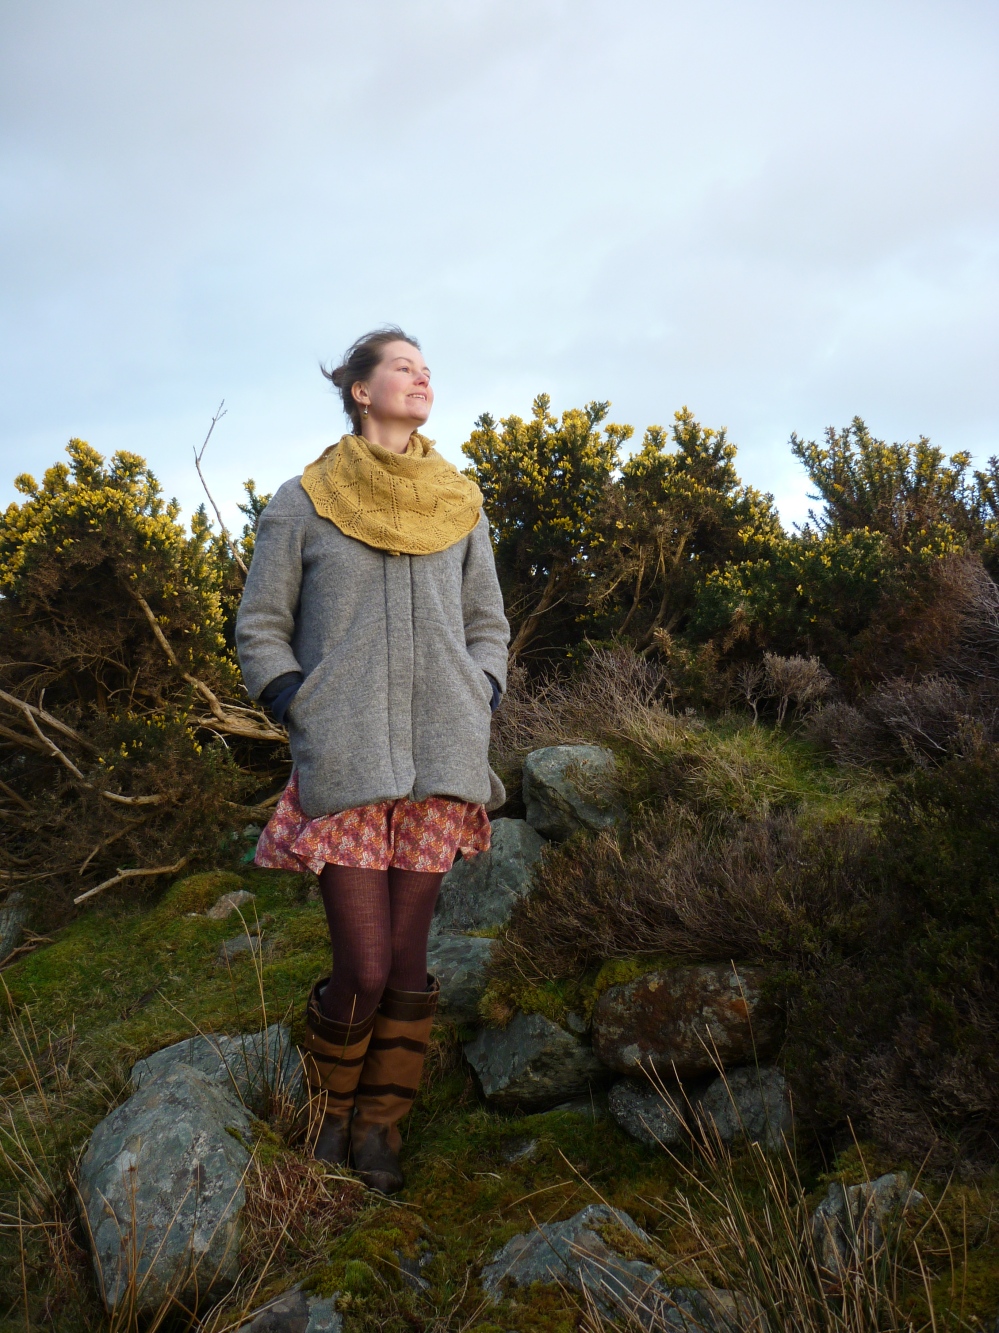
It’s been many years since I had a smart winter coat, which means I often feel rather tatty when I would actually like to look nice. The Moderne coat by Blueprints for Sewing caught my eye a long time ago: I love the simplicity of Version 2, the lack of collar (I love my shawls!), the 3/4 length sleeves and those divine style lines.
But making a coat?! That seemed like a new level of wizardry, and one which I was not sure I was ready for. But, with a trip to Copenhagen looming, I knew I had to get started.

One of the tricky things was finding fabric. I had an idea that I’d like the top and bottom half to be two subtly different colours. However, after receiving a few samples, I couldn’t find coordinating shades that were similar enough to get the look I wanted, so I ended up going for a solid grey all over. The wool is Fulled Loden from myfabrics.co.uk. A lovely 100% wool with many different tones in the grey.
The lining is a gorgeous flannel from Croft Mill. I pre-washed this as I wanted the flannel to be all fluffed up and soft and it’s just divine. I love it! To ensure that the sleeves allowed for easy wear, I used leftover lining from my sequin skirt as flannel would be a too sticky.
This pattern was another first for me in that I got the pattern printed through Patternsy. I didn’t fancy printing out and taping 70-odd bits of paper and having it professionally printed did make the whole process much easier and quicker.

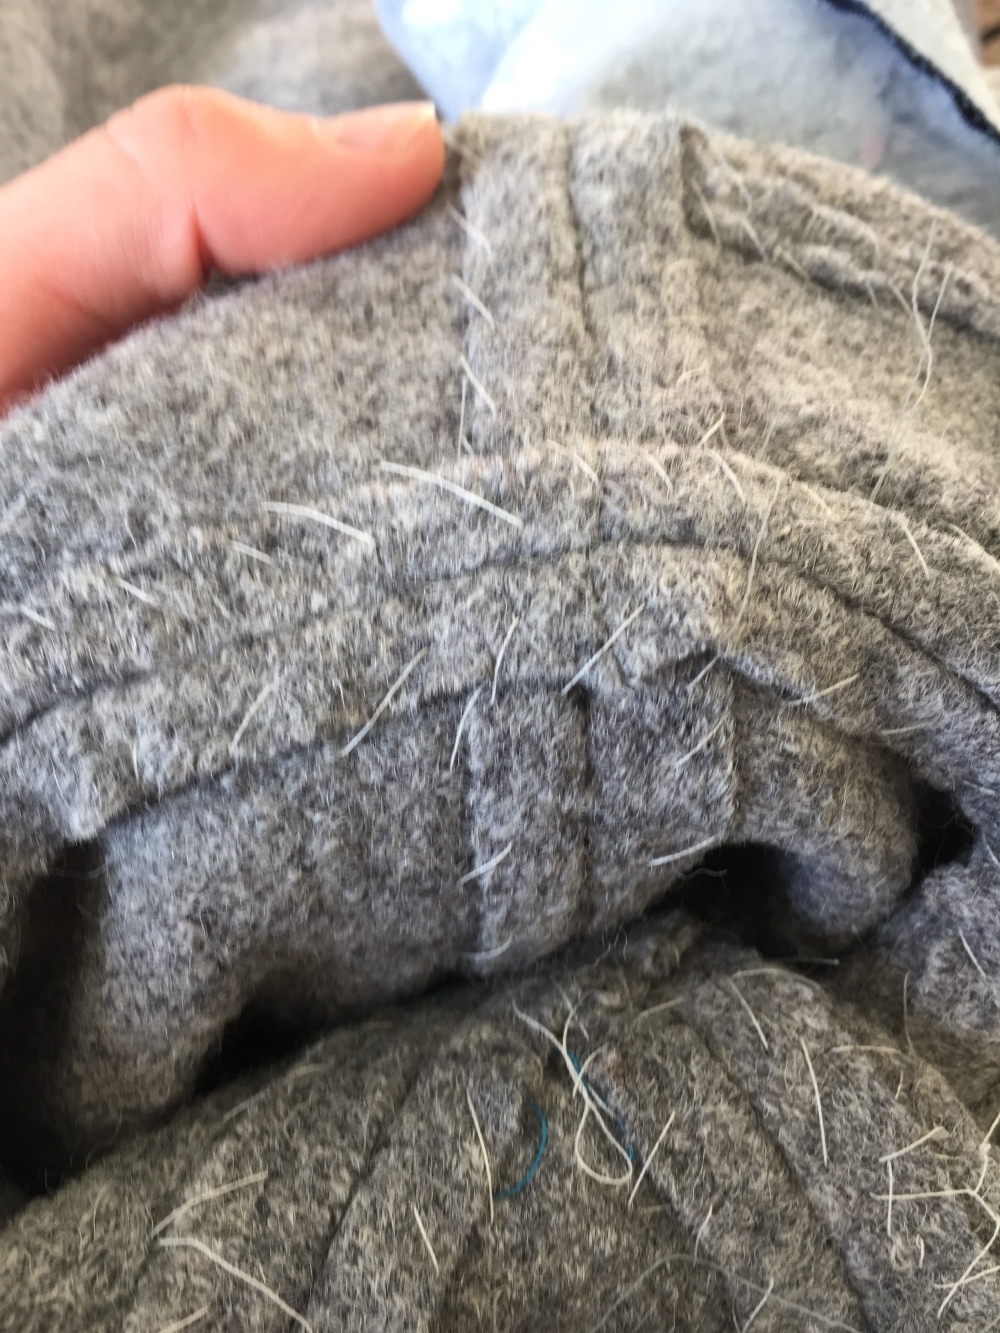
I don’t have spare/waste fabric that I’d be happy using as a toile, so I made up the lining first to get a sense of the fit. The pattern was super easy to put together: the flannel was gorgeous to work with, and the wool was as well. The wool sits at the bottom of the flannel as a hem facing, and sewing all those curves was surprisingly easy. I just made sure to clip the corners well and keep it slow. I did baste it, and that made a massive difference too. I am definitely Team Baste now!
The way the pattern is made up means that there’s no really large pattern pieces, which makes it easier for cutting out. I decided to go with size E/F as I’ve got broad shoulders and I wanted to be able to move (and cycle through the streets of Copenhagen!!) in the coat. Nothing worse than feeling constricted. The only change I made after making the lining was to move the pleat at the elbow down 1.5 inches so that it was actually at my elbow.

After the lining came the main fabric, and again it came together beautifully. It’s quite thick though, so I hand stitched all the seams open after pressing to try and prevent the seams warping during use. This was time consuming, but worth it, as after I’d finished and put the coat on for the first time, I was gutted to realise it was too big. Turning it back inside out could have been a much messier process if I’d not already neatened the wool seams.

The disappointment I felt at first try on was huge. I’d really enjoyed the process of making the coat: it was my first time working with a fully bagged lining and my satisfaction in the made object was really high. I’m pretty sure that I was too cautious and that the smaller size would have suited me just fine. There was no time to get stressed about the situation though, and I knew I’d never be happy leaving the coat as it was.
In the end, I narrowed each front by 1″, taking the width at chest level to 5½” each side. Then, on the back, I created a fish eye dart of 1″ at the join of the yoke. The intention was to bring the shoulders in a bit, as well as the overall bagginess at chest level. I also sewed the pockets shut by 2″ on the front edge as I found the opening so wide before that I wouldn’t have trusted anything to stay in!

Second time around, I took great care to ensure the seam lines from the pockets and yoke matched up across the placket as in my first attempt they hadn’t. I think had the plackets had notches at the point where they should meet these seam lines, neat finishing of the coat would have been much easier. I made my own notches to match up and I’m much happier post 2nd finishing.
To finish, I made sure to create an equal curve at the bottom of the placket, as my first attempt had been pretty skewwhiff. If I was making the coat again I would make this bottom line straight, as it’s the only feature of the coat that I don’t love.
In the end the coat took me about two full days and a few weekday evenings to finish, including taking apart and fixing. I am really glad that I took the extra effort to make the required changes as I utterly love the finished coat.
In the end, it was successfully completed prior to our visit to Copenhagen. The trip was utterly wonderful. We had such a blast again, and it truly is a city that I feel very at home in. Cycling around from place to place is such good fun, and I just love the youthful, laid-back feeling of the city. It has the feel of a town: friendly, informal, relaxed and as though everyone knows one another.

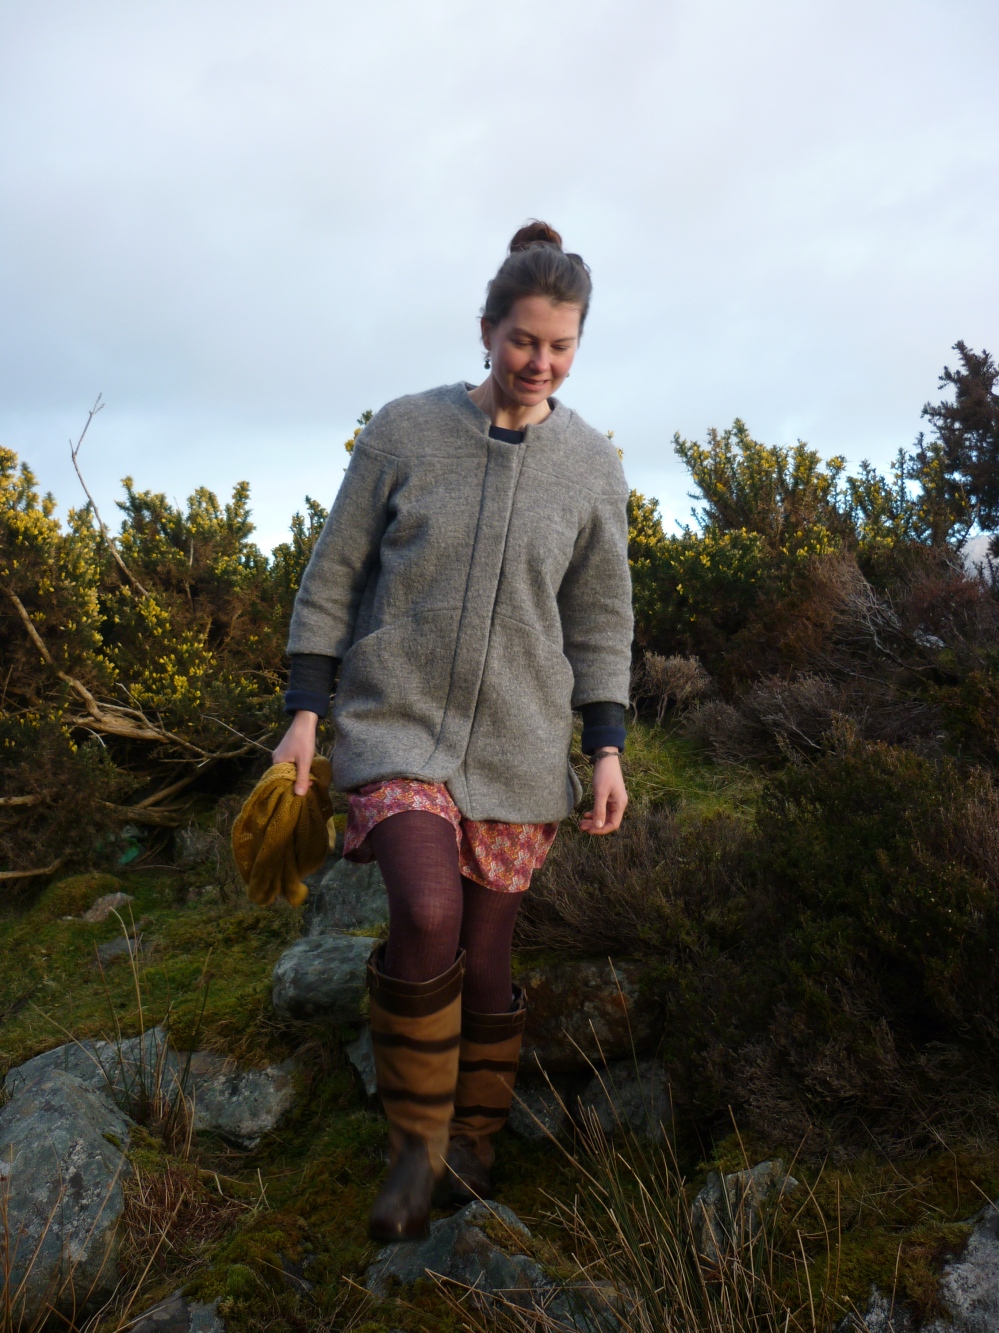


I use these deliciously large pockets all the time as they’re just perfectly cosy and warm. However, I do think I should have used a heavier interfacing on the top curve as I have a feeling they may stretch out over time.
These pockets are sewn up an additional two inches, so I think you’ll be able to imagine how gapey they were prior to being fixed.
One of my favourite things about this coat include the curved seam lines at the hem and sleeve. They are such simple details but I just adore how they look. This photo from Copenhagen captures the hem detail better than my tripod photos on South Uist.

Overall, I love this coat. I feel it to be exactly what I was wanting, which makes me very happy. It looks great with my shawls, and the length is also very handy. I’ve received a couple of compliments from friends and acquaintances and I’m yet to respond with “thanks, I made it!” to anyone that doesn’t already know I sew. Maybe that will come!!


Also worn with my Follow the Sun shawl, an a Pauline Alice Malvarosa dress which is several years old and one of my most beloved hand-mades.
Next up, some spring sewing to help my wardrobe adapt to the changing seasons 🙂

5 Comments Add yours